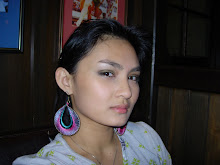
Anyway, today I'll be showing you how you can achieve the red lip look without looking like a street walker.
I've seen many girls out there who wear too much of everything. Some have piled on dark eyeshadow with bronzed to death cheeks and electric red lips; this isn't a good look gals. Here's a motto you must always remember when applying your make up (and dressing up, even!)
"Less is more."
In order to look your best, you can only play up one feature of your face at a time. Eyes or lips; if you wear light eyeshadow, you might be able to get away with a bright lipstick. If you wear loud eyeshadow, loud lips can look a bit too much; otherwise you'll look like you were a casualty at the paint factory....
Right! Let's begin, shall we?

Step 1: Concealer! if you have dark under-eye circles like me, the concealer is your best friend. Take it with you if you need to, even! Here, I've applied the concealer under my eyes and around my nose and mouth.

Step 2: Mineral foundation. You can use liquid foundation if you want, but this is a beginner step for those with little experience. I myself find that Maybelline's Mineral Power Powder Foundations are easy to use. I use my Body Shop kabuki brush to blend it in.
 Don't forget the neck area! I've seen girls with perfect foundations on their face, but the harsh edges (especially with liquid foundation) around the jawline gives it all away. Not a good look!
 Step 3: Smile till your cheeks round up; this is where you apply your blusher. Slowly build it up, and fade it back to your hairline.
 Step 4: In order to contour your face, squish your blush brush flat. If you have a flat brush, that would work too... :P
 Make a duckface; GOD, I hate that face, but it's the best way to figure out where your contouring should be. The sunken bits of your cheeks are where the contour colours should go. I start from the hairline towards the center of the cheek. Use a bronzer for this.
Step 5: Mascara! Loads of mascara. Volumizing and lengthening mascara works best with the red lip look. If you have trouble with applying mascara (having it clump up or not evenly applying it, or that your lashes are too short for that particular brush) place a card between your skin and lashes, and apply your mascara from the base of the lashes, wiggling the wand from side to side.

For best results, line your lips with a lip liner. I you have a lipliner that matches your lipstick closest, that would be best. but I only have neutral, so that'll have to do. Just make sure that the lipstick is blended in nicely with the lipliner.
The purpose of the lipliner is to prevent the lipstick from seeping into the fine lines around your mouth, which ruins the look.
 For best results, you should use a make-up brush as it provides you with better control over the spreading of the product.
Voila! Remember gals, less is more!
Products used:
Maybelline's Mineral Power Concealer in Medium Beige 2-4
Maybelline's Mineral Power Powder Foundation in Pure Beige 2
Make up sponge - available in packs of 20 at pharmacies
Designer Brands blush in Berry
Thin Lizzy's 6-in-1 powder compact, Light (bronzer)
NYX Doll Eye Mascara - Lengthening
NYX Lipliner in Neutral
Designer Brands Matte Lipstick in Lady in Red
Ecotools Blush Brush
Body Shop Kabuki brush


No comments:
Post a Comment