Tuesday, August 10, 2010

Sorry for the lack of posts!

Sorry for the lack of posts! I've been swamped with reading material from uni.

Instead, I will write a short post about why you shouldn't stick on too much make up.

I've seen many people with over bronzed face and over caked foundations. I know how it feels facing a selection of make up, loving every product that you see. But you can't pick everything and wear it all!

If you have trouble about what you want to wear out, think of what particular product you'd like to rock.

For example, I've been into the red lips look lately. I've been into my NYX MegaShine Lip Gloss in perfect red.


And as you know, you can't wear heavy eye colour AND heavy lips. So instead, I rocked the gloss. The trick with red lips is neutral everything else, strong lip colour and a tonne of mascara.

And maybe a bit of blush and a hint of contour.

I know this sounds like a repeat of my previous post, but I'm just saying, less is more. Keep that in mind, girls!

Otherwise, you'll look like...


MIMI~! I love Mimi but too much eye and lip make up is OVERWHELMING!

I'll post another tutorial soon... if my reading eases up.

Thursday, July 1, 2010

Red lips tutorial - Newbies ahoy!

Hello, make up newbies! I'm sorry for the delays in posts, but I've been a bit busy lately.

Anyway, today I'll be showing you how you can achieve the red lip look without looking like a street walker.

I've seen many girls out there who wear too much of everything. Some have piled on dark eyeshadow with bronzed to death cheeks and electric red lips; this isn't a good look gals. Here's a motto you must always remember when applying your make up (and dressing up, even!)

"Less is more."

In order to look your best, you can only play up one feature of your face at a time. Eyes or lips; if you wear light eyeshadow, you might be able to get away with a bright lipstick. If you wear loud eyeshadow, loud lips can look a bit too much; otherwise you'll look like you were a casualty at the paint factory....

Right! Let's begin, shall we?


Step 1: Concealer! if you have dark under-eye circles like me, the concealer is your best friend. Take it with you if you need to, even! Here, I've applied the concealer under my eyes and around my nose and mouth.


Step 2: Mineral foundation. You can use liquid foundation if you want, but this is a beginner step for those with little experience. I myself find that Maybelline's Mineral Power Powder Foundations are easy to use. I use my Body Shop kabuki brush to blend it in.


Don't forget the neck area! I've seen girls with perfect foundations on their face, but the harsh edges (especially with liquid foundation) around the jawline gives it all away. Not a good look!

Step 3: Smile till your cheeks round up; this is where you apply your blusher. Slowly build it up, and fade it back to your hairline.

Step 4: In order to contour your face, squish your blush brush flat. If you have a flat brush, that would work too... :P

Make a duckface; GOD, I hate that face, but it's the best way to figure out where your contouring should be. The sunken bits of your cheeks are where the contour colours should go. I start from the hairline towards the center of the cheek. Use a bronzer for this.


Step 5: Mascara! Loads of mascara. Volumizing and lengthening mascara works best with the red lip look. If you have trouble with applying mascara (having it clump up or not evenly applying it, or that your lashes are too short for that particular brush) place a card between your skin and lashes, and apply your mascara from the base of the lashes, wiggling the wand from side to side.


Step 6: Lipstick time!


For best results, line your lips with a lip liner. I you have a lipliner that matches your lipstick closest, that would be best. but I only have neutral, so that'll have to do. Just make sure that the lipstick is blended in nicely with the lipliner.

The purpose of the lipliner is to prevent the lipstick from seeping into the fine lines around your mouth, which ruins the look.

For best results, you should use a make-up brush as it provides you with better control over the spreading of the product.


Voila! Remember gals, less is more!

Products used:
Maybelline's Mineral Power Concealer in Medium Beige 2-4
Maybelline's Mineral Power Powder Foundation in Pure Beige 2
Make up sponge - available in packs of 20 at pharmacies
Designer Brands blush in Berry
Thin Lizzy's 6-in-1 powder compact, Light (bronzer)
NYX Doll Eye Mascara - Lengthening
NYX Lipliner in Neutral
Designer Brands Matte Lipstick in Lady in Red
Ecotools Blush Brush
Body Shop Kabuki brush

Sunday, May 30, 2010

First make-up tutorial! Concealers make all the difference!

Let's begin our journey into the world of make-up with an introduction to the humble concealer.

The concealer I use is Maybelline's Mineral Power Natural Perfecting Concealer.
I took this photo from their website... :P

My skin tone would be in the medium range, I think, and I use the medium beige 2-4 concealer.

To demonstrate how much a difference concealers make when applied, I'll post a photo of myself before, during, and after application of the product.


This is a photo of me before wearing any concealer. Notice how I have an uneven skin tone; I have dark patches around my mouth and under my eyes. And yes, I have a messy wall. I stack boxes on top of my book shelf. It's a small room, what do you want?!

I apply my concealer in common problem areas; under my eyes and on the eyelid (which can help make eyeshadows last longer,) around my nose, and around my mouth. To blend the product in, I use an applicator sponge.

Voila! See how big a difference that is?

You can apply concealers onto spots on your face, and also to hide zits! Just make sure that they don't clog your pores. Look for products that don't contain fragrance, talc or oil. If you want to smell nice, put on perfume; your face shouldn't reek of product fragrance.

Maybelline claims that their products don't clog pores and that they last all day. Personally, I find that to be very true. I break out easily, but as I avoid oily products, I've managed to keep the zits at bay.

So, newbies, this is where you should begin. Step 1 would be to find a concealer that suits you. Match is as closely as you can to your skin tone.

Alright, noobs, I hope this is helpful. I'll try to keep the posts coming.

Much love and good luck,
SharK the Make-Up Noob

source: http://www.maybelline.com/Product/Face/Concealer/Mineral-Power-Natural-Perfecting-Concealer.htm

Thursday, May 27, 2010

Make-up for beginners - INTRO

Hi, and welcome to my blog. The aim of this blog is to inspire others who are curious about make-up but are too intimidated by the prospect of failure.

Fear not!

I'm here to tell you that I too was once intimidated by make-up. I knew nothing about what I needed, how to apply make-up, and what looks I should wear to certain occasions.

The first thing all make-up noobs need to know is that you don't need to have luxury brand items to look great. You can use drug store brands like Maybelline and Cover Girl to achieve your desired looks.

Here is a list of items that all make-up newbies should begin with;


You should start out with (top to bottom, left to right) black mascara, concealer, tinted lip gloss, brown and/or black eyeliner, make-up sponges, powder foundation, and a powder foundation brush.

  • The mascara that I have in the photo is from NYX; this one is for length. If you have short lashes, get one that adds length. The ones from Maybelline such as The Colossal Volume Express mascara is great for adding volume and length.
  • I am a fan of the Maybelline's Mineral Power range, and I regularly use the Mineral Power concealer. Match it to your skin tone. You can use concealers to conceal blemishes, redness, zits, or in my case, dark under eye circles.
  • Lip gloss is apparently one of the most popular make-up item. I have this one from Australis, which is also one of my favourite brands. You can carry it with you for reapplication.
  • Eyeliners are great for creating smoky eyes. I have the brown one from NYX, and the black one from Lancome (which my mum bought for me :P.)
  • The make-up sponge is used to blend the concealer onto the skin. You can use your fingers if you wish, but I use the sponge because I find that it spreads the product around nicely.
  • Maybeline's Mineral Power Powder Foundation is great; it doesn't clog my pores, and it's easy to use. Match it to your skin tone as closely as you can, otherwise you'll end up looking either too tanned in the face or too pale!
  • The kabuki brush came with the powder foundation; it's not that great of a brush, but it does the job, kinda.

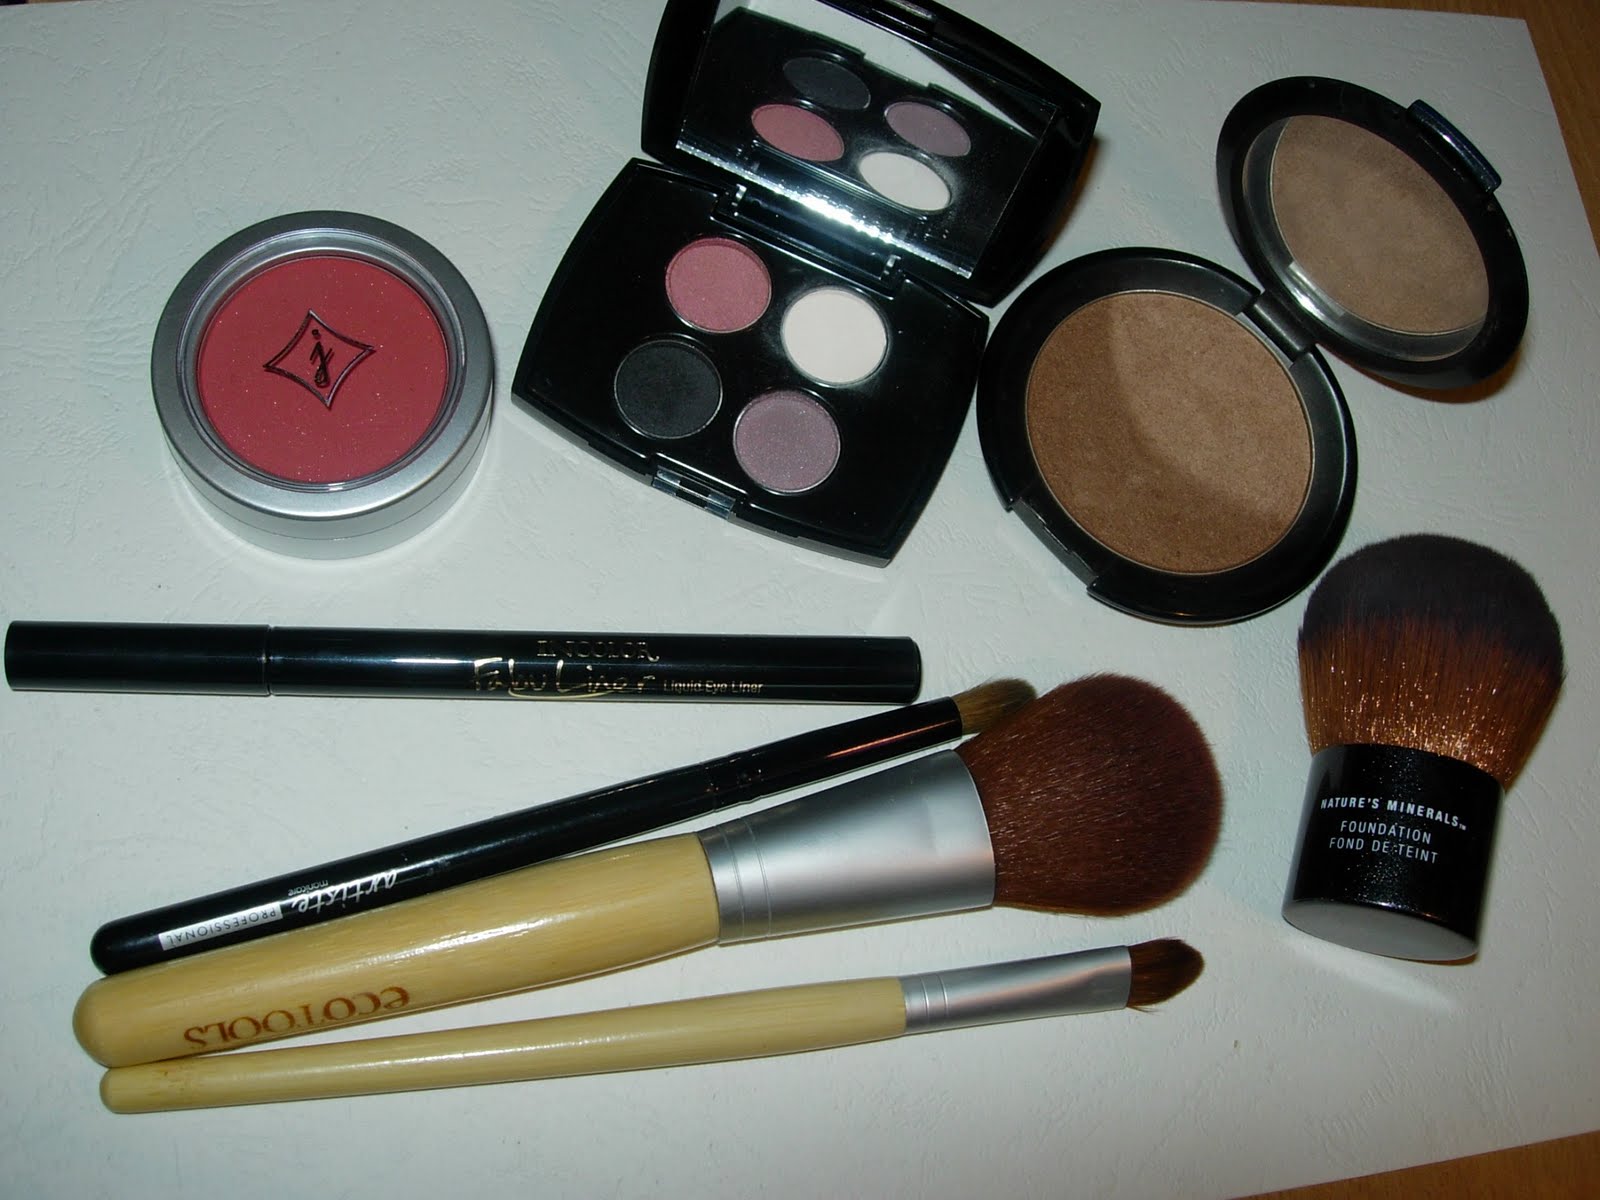
(Top to bottom, left to right.)

  • The blusher that I have here is from Jordana; it's a dollar store brand from the USA, and I love it because it's very pigmented. Other brands such as Maybelline and Designer Brands (an Australian brand, I think) have great blushers that are affordable.
  • The liquid eyeliner that I have is Fabuliner from Jordana; it's easy to use, and easy to remove as well. Beware though, make-up newbies, liquid eyeliner takes a lot of patience and a lot of practice. Do not give up. Keep practising, and don't let failure hamper you.
  • A crease brush is great for getting eyeshadow into your crease and under your eyes.
  • This blush brush is from Eco Tools; they're made of bamboo, which is a sustainable material, and the ferrule is made from recycled aluminium. So is the eyeshadow brush; we'll be using this a lot later on. Another thing that I love about Eco Tools is that the bristles are made of synthetic materials; they're cruelty free!
  • The eyeshadow quad that I have there is from Lancome; I bought it offline for cheap, maybe about NZ$16. You don't need branded items, remember. Covergirl has some very nice quads that I think make-up newbies should check out.
  • A bronzer from Thin Lizzy's! Bronzers are great for adding colour to your face. Sometimes, you can use them as a blush as well, and also as an eyeshadow!
  • The big kabuki brush in the photo is optional; it's from The Body Shop. The bristles are synthetic as well. I love this brush because it allows me to apply powder to my face evenly, and I can build the powder up.
Don't be discouraged, make-up newbies. You don't have to buy all these in one go. Pick them up one at a time, or in pairs (eyeshadow quad and eyeshadow brush, blusher and blush brush, etc....)

There are a lot of make-up tutorials on youtube as well. You can learn to apply certain make-up items to your face by watching those videos.

I will be posting more in the future, and hopefully my next post will be tutorials for beginners.

Until then, thanks for reading.
-SharK